basic soldering and wiring reliability: a beginner's guide
Reliable soldering is one of the most useful practical skills for a maker or DIY enthusiast and it need not be intimidating for a beginner. This guide focuses on practical steps and simple habits that improve the longevity and safety of your electrical connections. You will learn about the tools you need, how to prepare components, how to make neat solder joints and how to protect wiring against strain and corrosion. The aim is to help you move from occasional, unreliable repairs to consistent, reliable work that performs well in projects and prototypes.
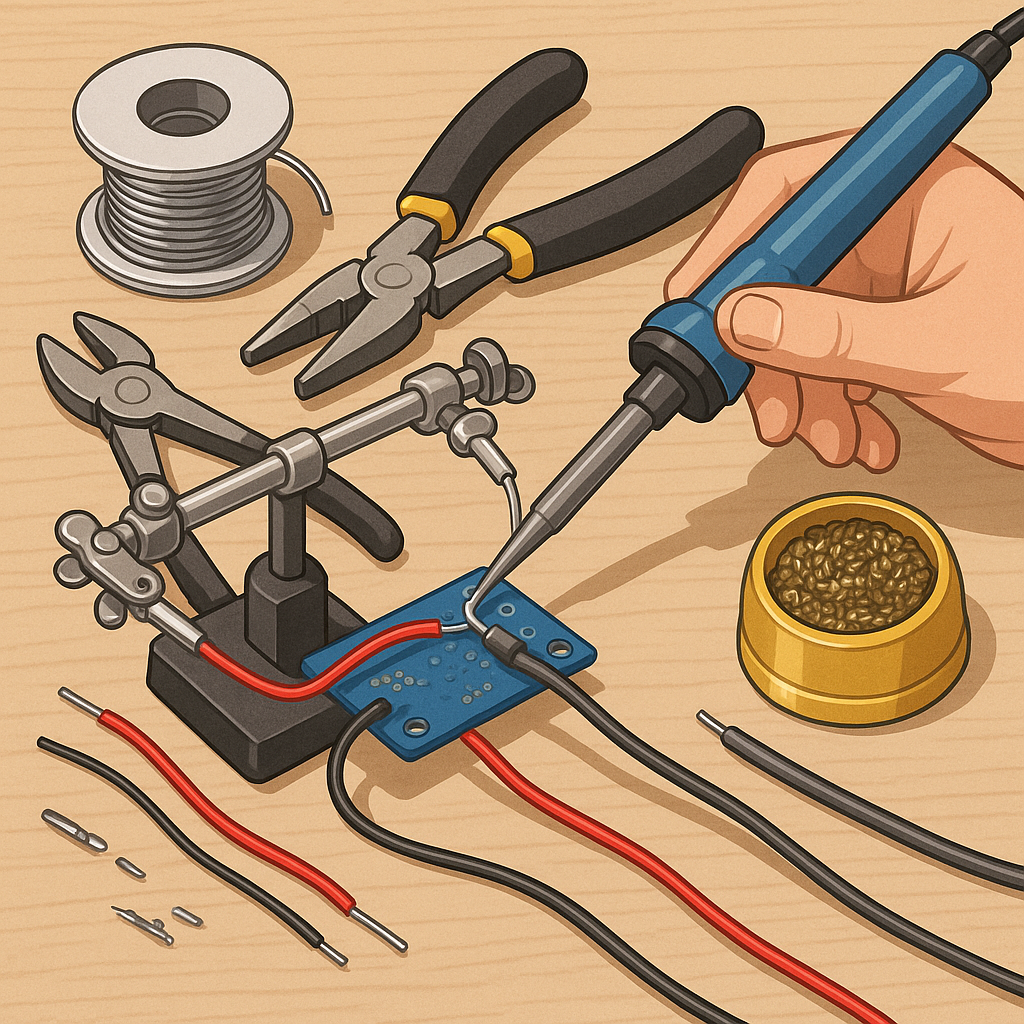
Start with the right equipment and consumables because the quality of results depends heavily on what you use. A temperature-controlled soldering iron is worth the extra cost compared to a cheap fixed-temperature iron because it reduces the risk of overheating parts. Use a solder with a flux core suitable for electronics, and prefer a 60/40 tin-lead alloy for practice if you have safe handling measures in place, otherwise choose a recommended lead-free alternative. Keep a clean brass sponge or wet sponge for tip maintenance, flux or flux pen for stubborn joints, desolder braid for corrections, wire strippers sized for your conductor and a basic multimeter for testing. Good ventilation and eye protection are essential for safety.
- Temperature-controlled soldering iron with a small chisel or conical tip.
- Electronics solder (flux core) and a separate bottle of liquid flux for difficult joints.
- Wire strippers, side cutters, tweezers and helping hands or a third-hand tool.
- Desolder braid, a small file or sandpaper for oxidised surfaces, heat-shrink tubing and a multimeter.
Preparation makes soldering much easier and more reliable so always clean and dress components before applying heat. Strip only the amount of insulation you need so the bare conductor is exposed for a good mechanical and soldered joint. Tin stranded wire by heating it and applying a small amount of solder to bind the strands together before inserting into a terminal or soldering to a pad. For PCB pins and component leads, remove any oxidation with a small file or isopropyl alcohol on a lint-free cloth, then apply a little flux to encourage wetting. Mechanical fit and alignment are important; solder should join the parts rather than try to fill a poor mechanical connection.
Making a reliable solder joint is a matter of heat control, wetting and time rather than simply adding more solder. Heat the pad and the component lead together so both reach soldering temperature, then feed the solder to the joint and not directly to the iron tip. A good joint is shiny, smooth and forms a neat concave fillet between the pad and the lead. Avoid cold solder joints, which appear dull and grainy and indicate poor wetting or insufficient heat. If a joint looks suspect, reheat it with a little more flux and add or remove solder as necessary until the wetting looks correct and the joint is mechanically sound.
Insulation and strain relief protect joints from mechanical fatigue and environmental damage so apply them before final assembly where possible. Use appropriately sized heat-shrink tubing over soldered pairs and use cable ties or adhesive-mounted anchors to fix cables close to their termination point, preventing movement at the joint. For connectors that will see repeated mating cycles, consider using crimp contacts rather than relying solely on soldered wires, because crimped contacts offer better mechanical resilience. In harsh or outdoor environments use conformal coating or sealed connectors and consider tin-plating or corrosion-resistant terminals to resist oxidation.
Testing and inspection will catch issues early and save time later so make it a habit to check every connection. Visually inspect joints for complete wetting, smooth fillets and the absence of solder bridges. Electrically test for continuity and correct resistance with a multimeter and perform a gentle mechanical wiggle test to see if the joint holds under movement. If you are working on powered circuits, perform initial tests with current-limited supplies or fuses in place to protect components from accidental shorts. Document recurring faults and the remedies you applied so you learn from mistakes and refine your technique.
Common beginner mistakes include overheating components, leaving too much bare wire exposed, insufficient flux or poor tip maintenance, and not providing strain relief or insulation. Practice on scrap components and simple kits to gain confidence before moving to critical projects, and store consumables in a dry place to prevent flux degradation and solder oxidation. For more step-by-step projects and practical exercises that help build confidence with these techniques, see the Maker & DIY collection on the site at our Maker & DIY posts. With regular practice and attention to preparation, heat control and protection, you will quickly see improvements in basic soldering and wiring reliability. For more builds and experiments, visit my main RC projects page.
Comments
Post a Comment