DIY workshop organisation: practical tips and tricks for a tidy, efficient space
Good workshop organisation makes projects quicker, safer and more enjoyable, and it pays dividends even when you are only spending an hour on a quick repair. This guide focuses on pragmatic, low-cost changes you can make to improve workflow, protect tools and reduce frustration when you need a specific bit or part. It is aimed at makers, hobbyists and anyone running a small home workshop who wants to get more done with less searching and fewer interruptions.
Start with the layout by defining clear zones for the tasks you do most often, and measure the space before you commit to benches or shelving. Typical zones are a primary bench for assembly, a bench or stand for heavy tools, a finishing area for sanding and painting, and a storage area for raw materials. Leave clear traffic routes so you can move larger stocks or assemblies without bumping into benches, and position power tools near sockets or plan to add dedicated circuits if you use a lot of high-draw equipment.
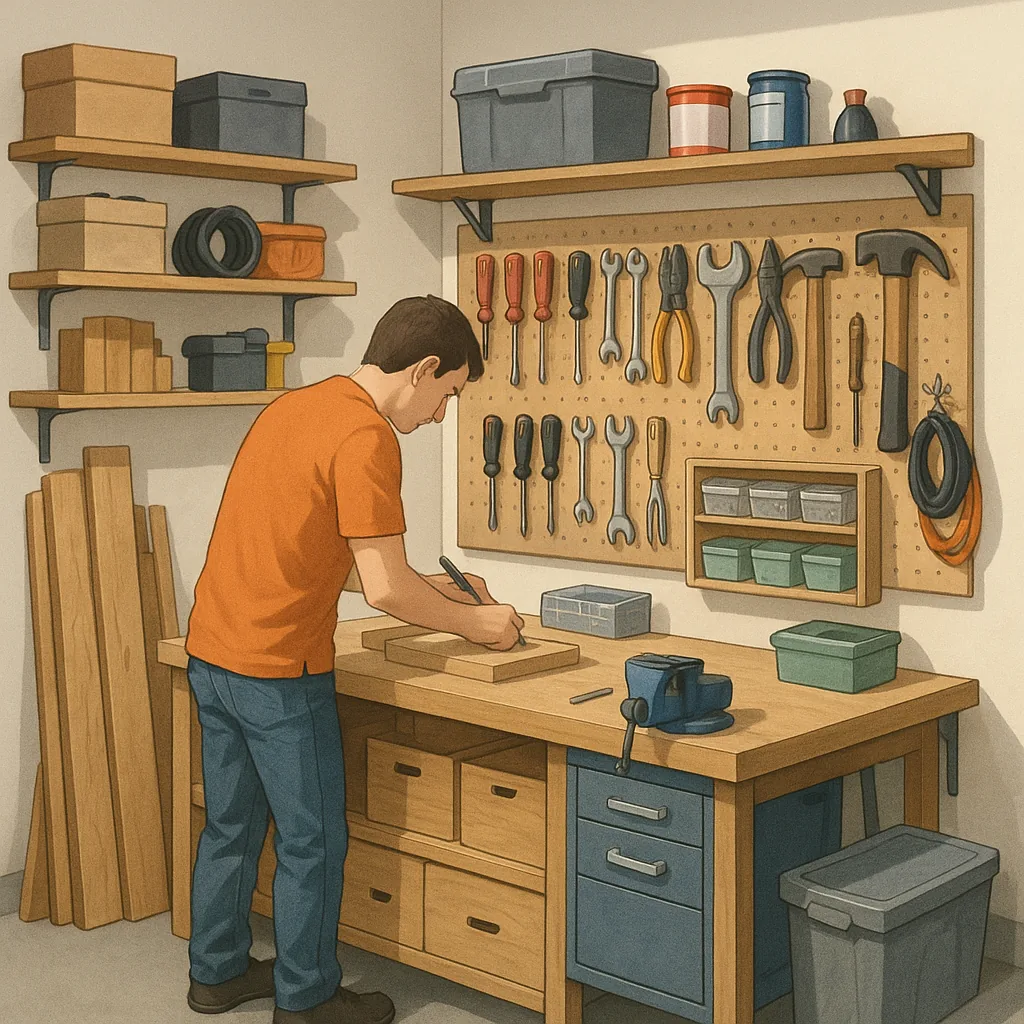
Tool storage is worth investing thought into because when tools have a home you will put them back, and you will see when something is missing. Use a combination of pegboard for frequently used hand tools, a shadow-board approach for sets of tools so you can see at a glance what is absent, and labelled drawers or modular bins for smaller items. Vertical space is often the most underused asset in a workshop, so fit shelving higher up for seldom-used items and keep the bench clear for active work.
Organising consumables and raw materials removes a large source of downtime, so group like with like and implement first-in first-out rotation for materials that can age or degrade. Clear plastic containers and labelled jars are inexpensive and make it easier to spot quantities at a glance, and small parts organisers work well for screws, nuts and washers. Keep flammable or volatile adhesives and finishes in a dedicated ventilated cabinet, and store batteries and chemicals separately from metalwork to reduce the risk of accidental reactions or short circuits.
Design workflows around projects rather than tools when possible, by creating temporary staging areas where current projects live between sessions and by using small trays or boxes for project parts. Make jigs and repeatable fixtures so you do not have to re-measure or re-clamp for common operations, and have a set area for finished items waiting for paint, varnish or assembly. A simple project folder or notebook stored near the bench helps you record measurements, materials required and what remains to be done, reducing rework when you return to a job days later.
Maintenance and cleanliness are part of organisation because a tidy workshop is a safer and more efficient one. Schedule short end-of-day routines such as running a hoover over benches, emptying dust-collection bins and wiping down cutting surfaces, and keep consumables for maintenance like blades and belts in a marked spot so replacements are never far away. Good lighting and clear labelling improve accuracy and reduce errors, while cable management using clips and retractable reels reduces trip hazards and keeps power cables out of the way of cutting tools.
Here are practical tips and quick wins you can apply immediately.
- Mark zones on the floor with tape when planning a new layout to visualise workflow before building benches.
- Use clear containers for small parts and label both the lid and the front for easy shelf retrieval.
- Create a battery charging station with a bin for discharged cells and a labelled tray for charged ones.
- Keep a small, well-stocked repair kit by the bench for snagging lost screws, spare hinges or quick fixes.
- Implement a simple weekly 15-minute tidy focused on the most-used area to build a maintenance habit.
Organisation is an ongoing process and you should expect to tweak your layout and storage as your projects and tools change. If you want to explore project ideas and workshop builds that illustrate some of these organisation concepts, take a look at the Maker & DIY tag on this blog for practical examples and inspiration by following this link to the label section of the site: Maker & DIY tag. Keep improvements incremental and document what works so your workshop evolves into a space that supports your creativity rather than getting in the way. For more builds and experiments, visit my main RC projects page.
Comments
Post a Comment