DIY workshop organisation: a step-by-step tutorial for a practical workspace.
Getting your workshop organised changes how you work as much as the tools you own, and this tutorial takes you through a clear sequence of steps to create a practical, tidy and efficient space. Start by defining what you will use the workshop for and which projects are most common, because an organised workshop supports the activities you actually do rather than an idealised version of them. Make a short list of the three to five project types you expect to work on most often, and note the tools, materials and workspace each needs. This planning step will guide decisions about bench space, storage and power, and will save time and money later in the process.
Step 1 is zoning the workshop so related activities sit near each other and the workflow moves logically from raw material to finished item. Typical zones are cutting and heavy work, assembly and fine work, finishing and painting, and storage and supplies. Use tape on the floor to mock up zones before committing to benches or fixed shelving, and allow clear pathways for carrying large items safely. Consider proximity to sockets, dust extraction and ventilation when deciding where to place powered machinery or a paint area, because these practical details strongly affect daily convenience and safety.
Step 2 is arranging the main workbench and tool layout to match your workflow, which reduces movement and keeps frequently used items within reach. Position the workbench so you have good light and a comfortable working height, and leave space underneath for bins or a rolling tool cabinet. If you work on both large and small projects, plan for a clear bench area plus a smaller, dedicated bench for precision tasks. Install a power strip or pop-up outlets at bench height so you do not have to crawl under a bench to plug in tools and chargers.
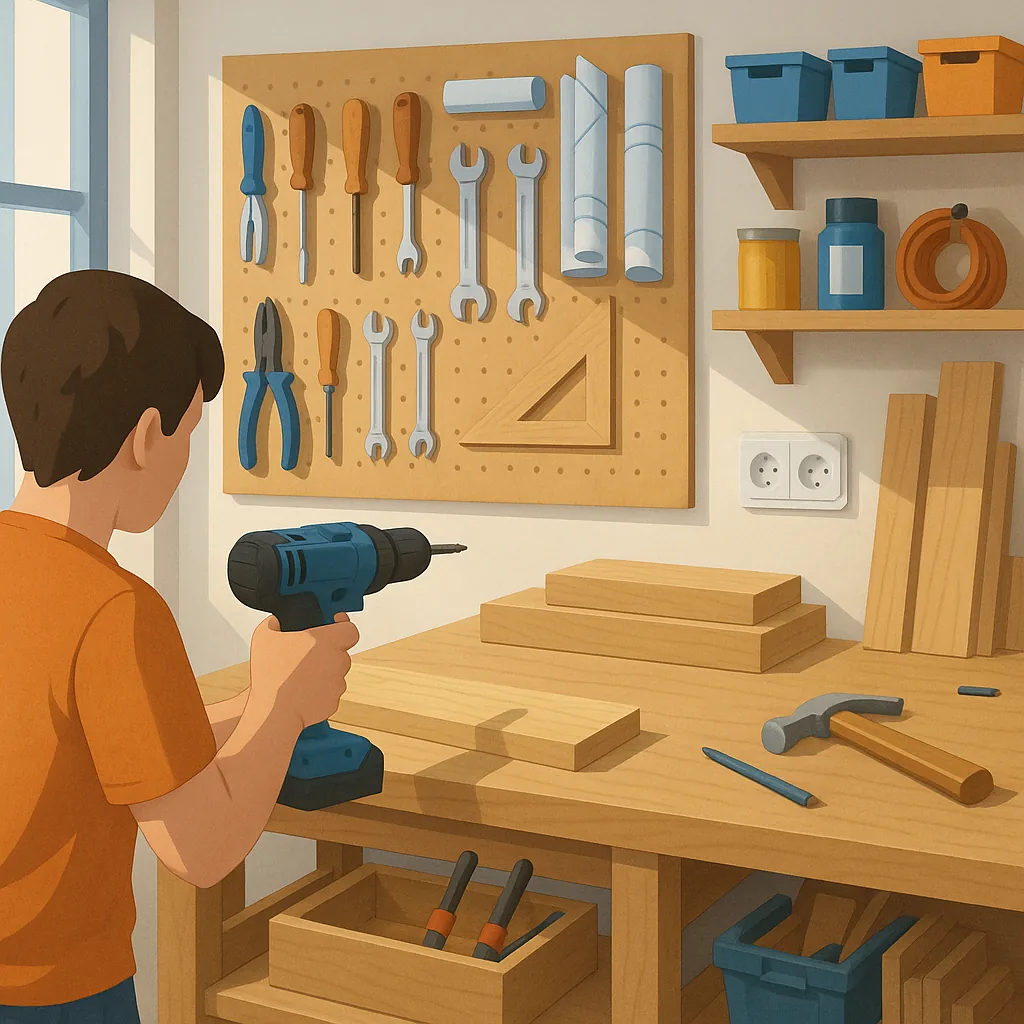
- Wall-mounted pegboards or slatwalls for hand tools provide visibility and quick retrieval.
- Stackable clear plastic bins are useful for fasteners and small parts and let you see contents at a glance.
- Drawer organisers and labelled boxes keep small consumables separated and tidy.
- Open shelving for lumber and bulky materials avoids awkward bending and permits easy stock rotation.
Step 3 focuses on storage strategies that suit the items you use often, and on labelling to make the system discoverable for others. Put commonly used hand tools on a pegboard with outlines or a shadow board so each tool has a home, and use shallow drawers with organisers for sockets, drill bits and clamps. For consumables and small parts, use clear bins or labelled jars; record quantities for items you replace frequently so restocking is straightforward. If you like, create a simple inventory sheet pinned near the door or saved on a phone to note low-stock items as you use them.
Step 4 is about organising larger tools and machines with accessibility and safety in mind, and this is where mobility pays off. Mount heavier items on lockable castors where possible so you can reconfigure the space for different projects or for passing large assemblies through the workshop. Keep dust-producing machines near extraction systems and avoid placing a bench saw where blades are at head height for walkways. Ensure that clearances around machines permit safe operation and maintenance, and store jigs and fixtures nearby so setup time is minimal.
Step 5 covers consumables, maintenance routines and simple habits that keep the workshop functioning well over time. Label shelves and bins clearly, keep a small cleaning kit by the door and adopt a five-minute tidy routine at the end of each session to return tools and clear the bench. Schedule periodic checks for sharpening blades, topping up lubrication and inspecting extension leads and dust extractors for wear. For inspiration on storage ideas and project-specific organisation, see the related Maker & DIY label which collects practical posts for home workshops like yours.
The final step is adopting a maintenance habit and reviewing your layout after a few projects to fine-tune what works and what does not. Note any recurring bottlenecks such as inadequate bench space, poor lighting or inconvenient tool locations and adjust accordingly, using mobile units or shelving to trial changes before committing to permanent installations. A good workshop evolves with you, and small, deliberate improvements after each project will keep your space efficient, safe and rewarding to use, making future projects quicker and more enjoyable. For more builds and experiments, visit my main RC projects page.
Comments
Post a Comment